> For the complete documentation index, see [llms.txt](https://docs.jaka.app/shopify/llms.txt). Markdown versions of documentation pages are available by appending `.md` to page URLs; this page is available as [Markdown](https://docs.jaka.app/shopify/affiliate-email-notifications/admin-email-notifications.md).
# Admin email notifications
Admin Email Notifications are emails sent **to you (the store owner or admin team)** to keep you informed about important affiliate activity.
These emails help you:
* Know when new affiliates sign up
* Track new sales and conversions
***
### ✅ How Admin Email Notifications Work
1. An affiliate action happens\
(for example: new affiliate signup or new conversion)
2. Jaka triggers an admin notification email
3. The email is sent to the admin email addresses you set
> You can choose which emails to receive and who receives them.
***
### ⚙️ Where to Manage Admin Emails
Go to:
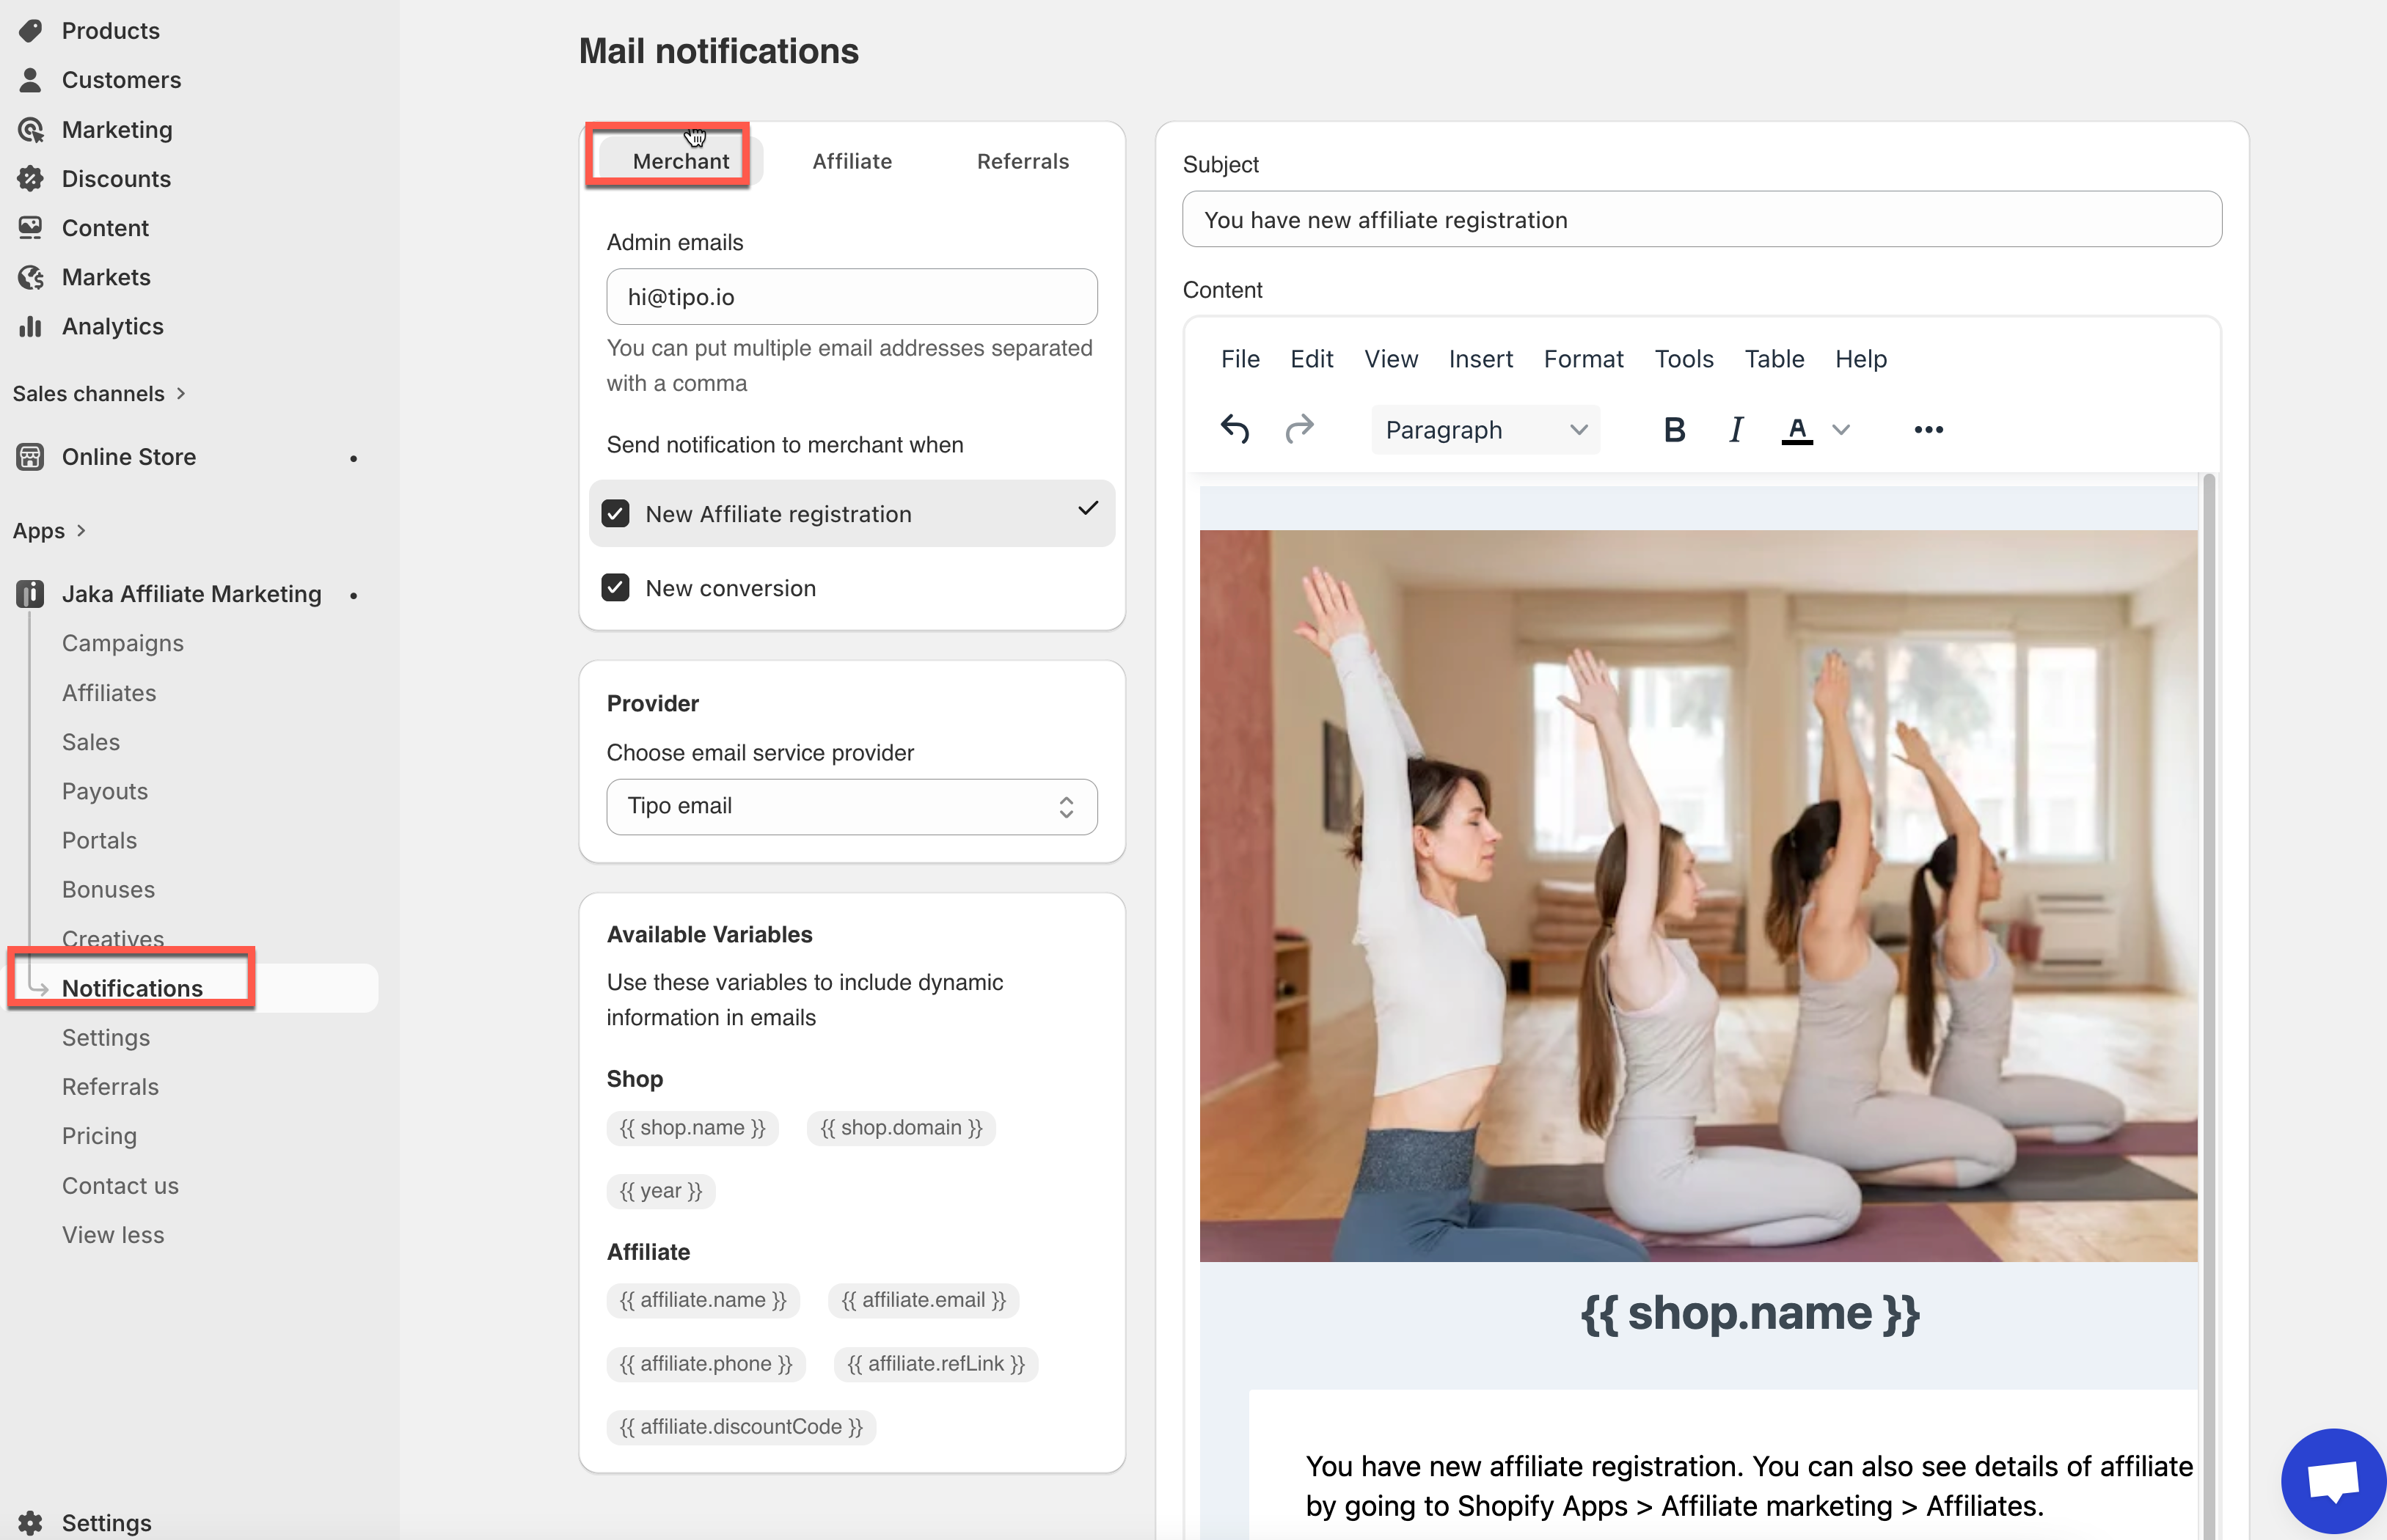
Go to the app > click **Notifications** on the left menu > click **Merchant** tab
Here you can:
* Set admin email recipients
* Choose which events send emails
* Edit email subject and content
* Select the email provider
***
### ⚙️ Step 1: Set Admin Email Recipients
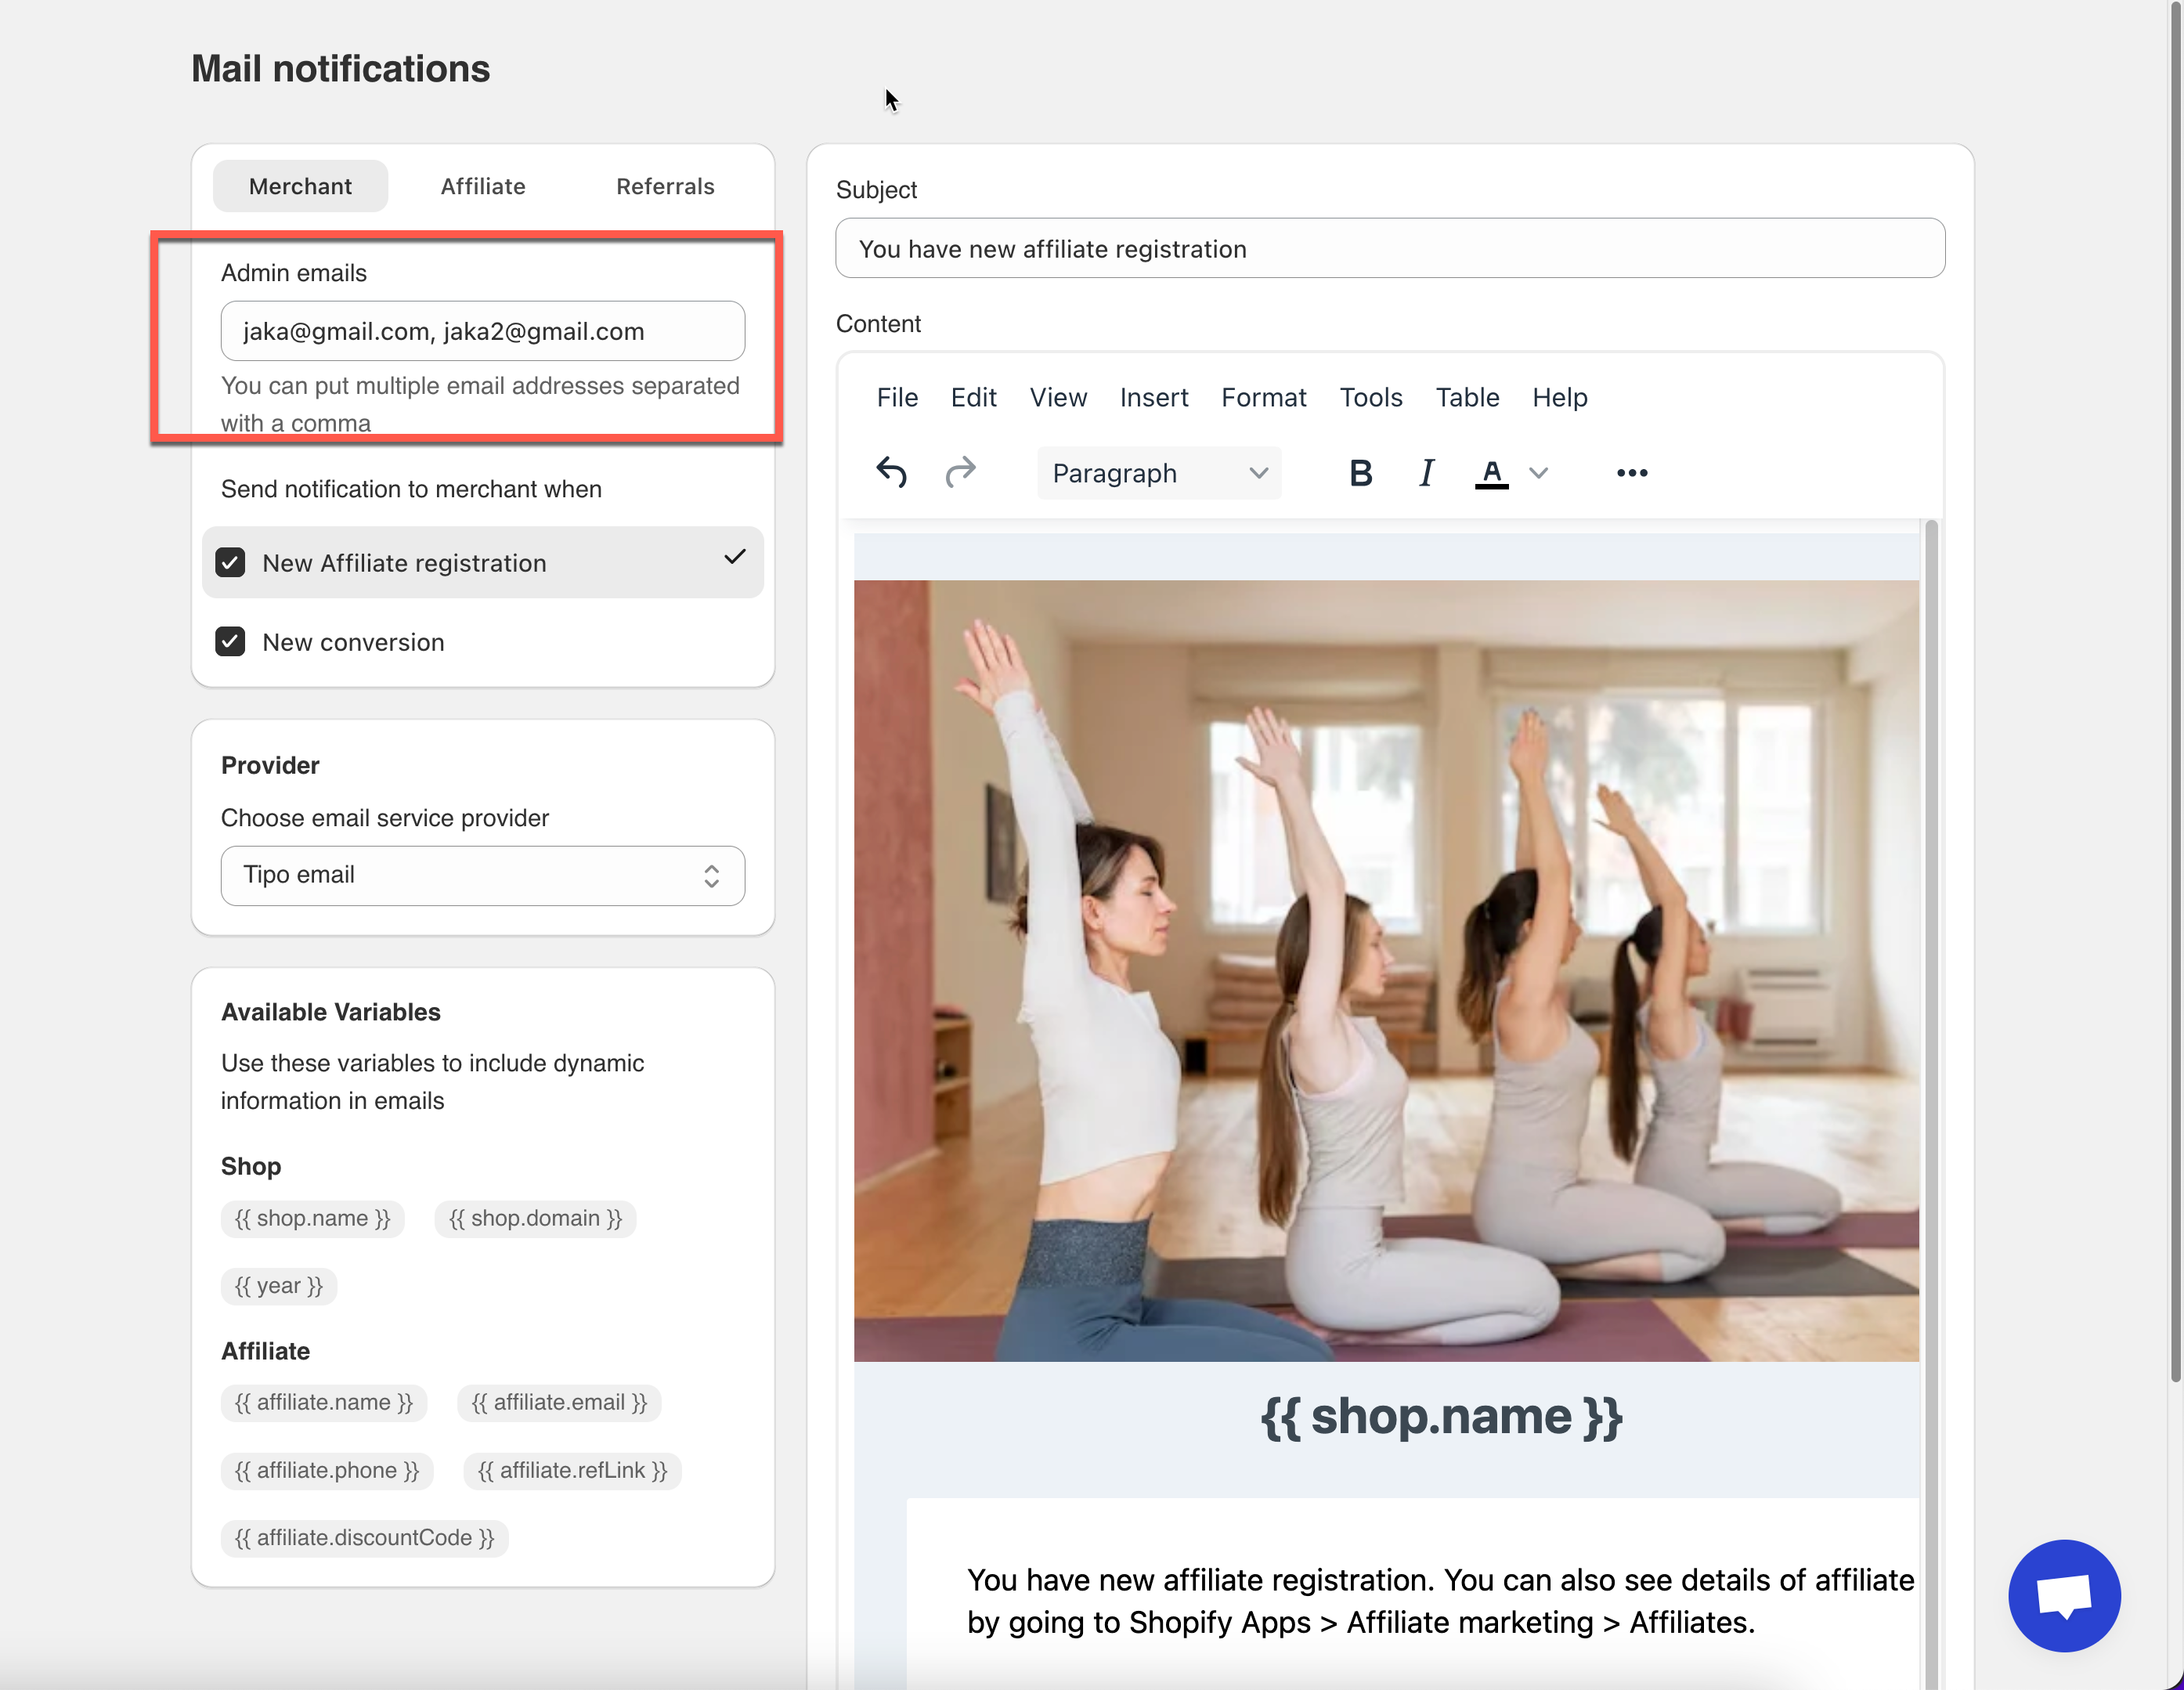
In the **Admin emails** field:
* Enter one or more email addresses
* Separate multiple emails with commas
Example:
```
jaka@gmail.com, jaka2@gmail.com
```
📌 All listed emails will receive admin notifications.
***
### ⚙️ Step 2: Choose When to Send Admin Emails
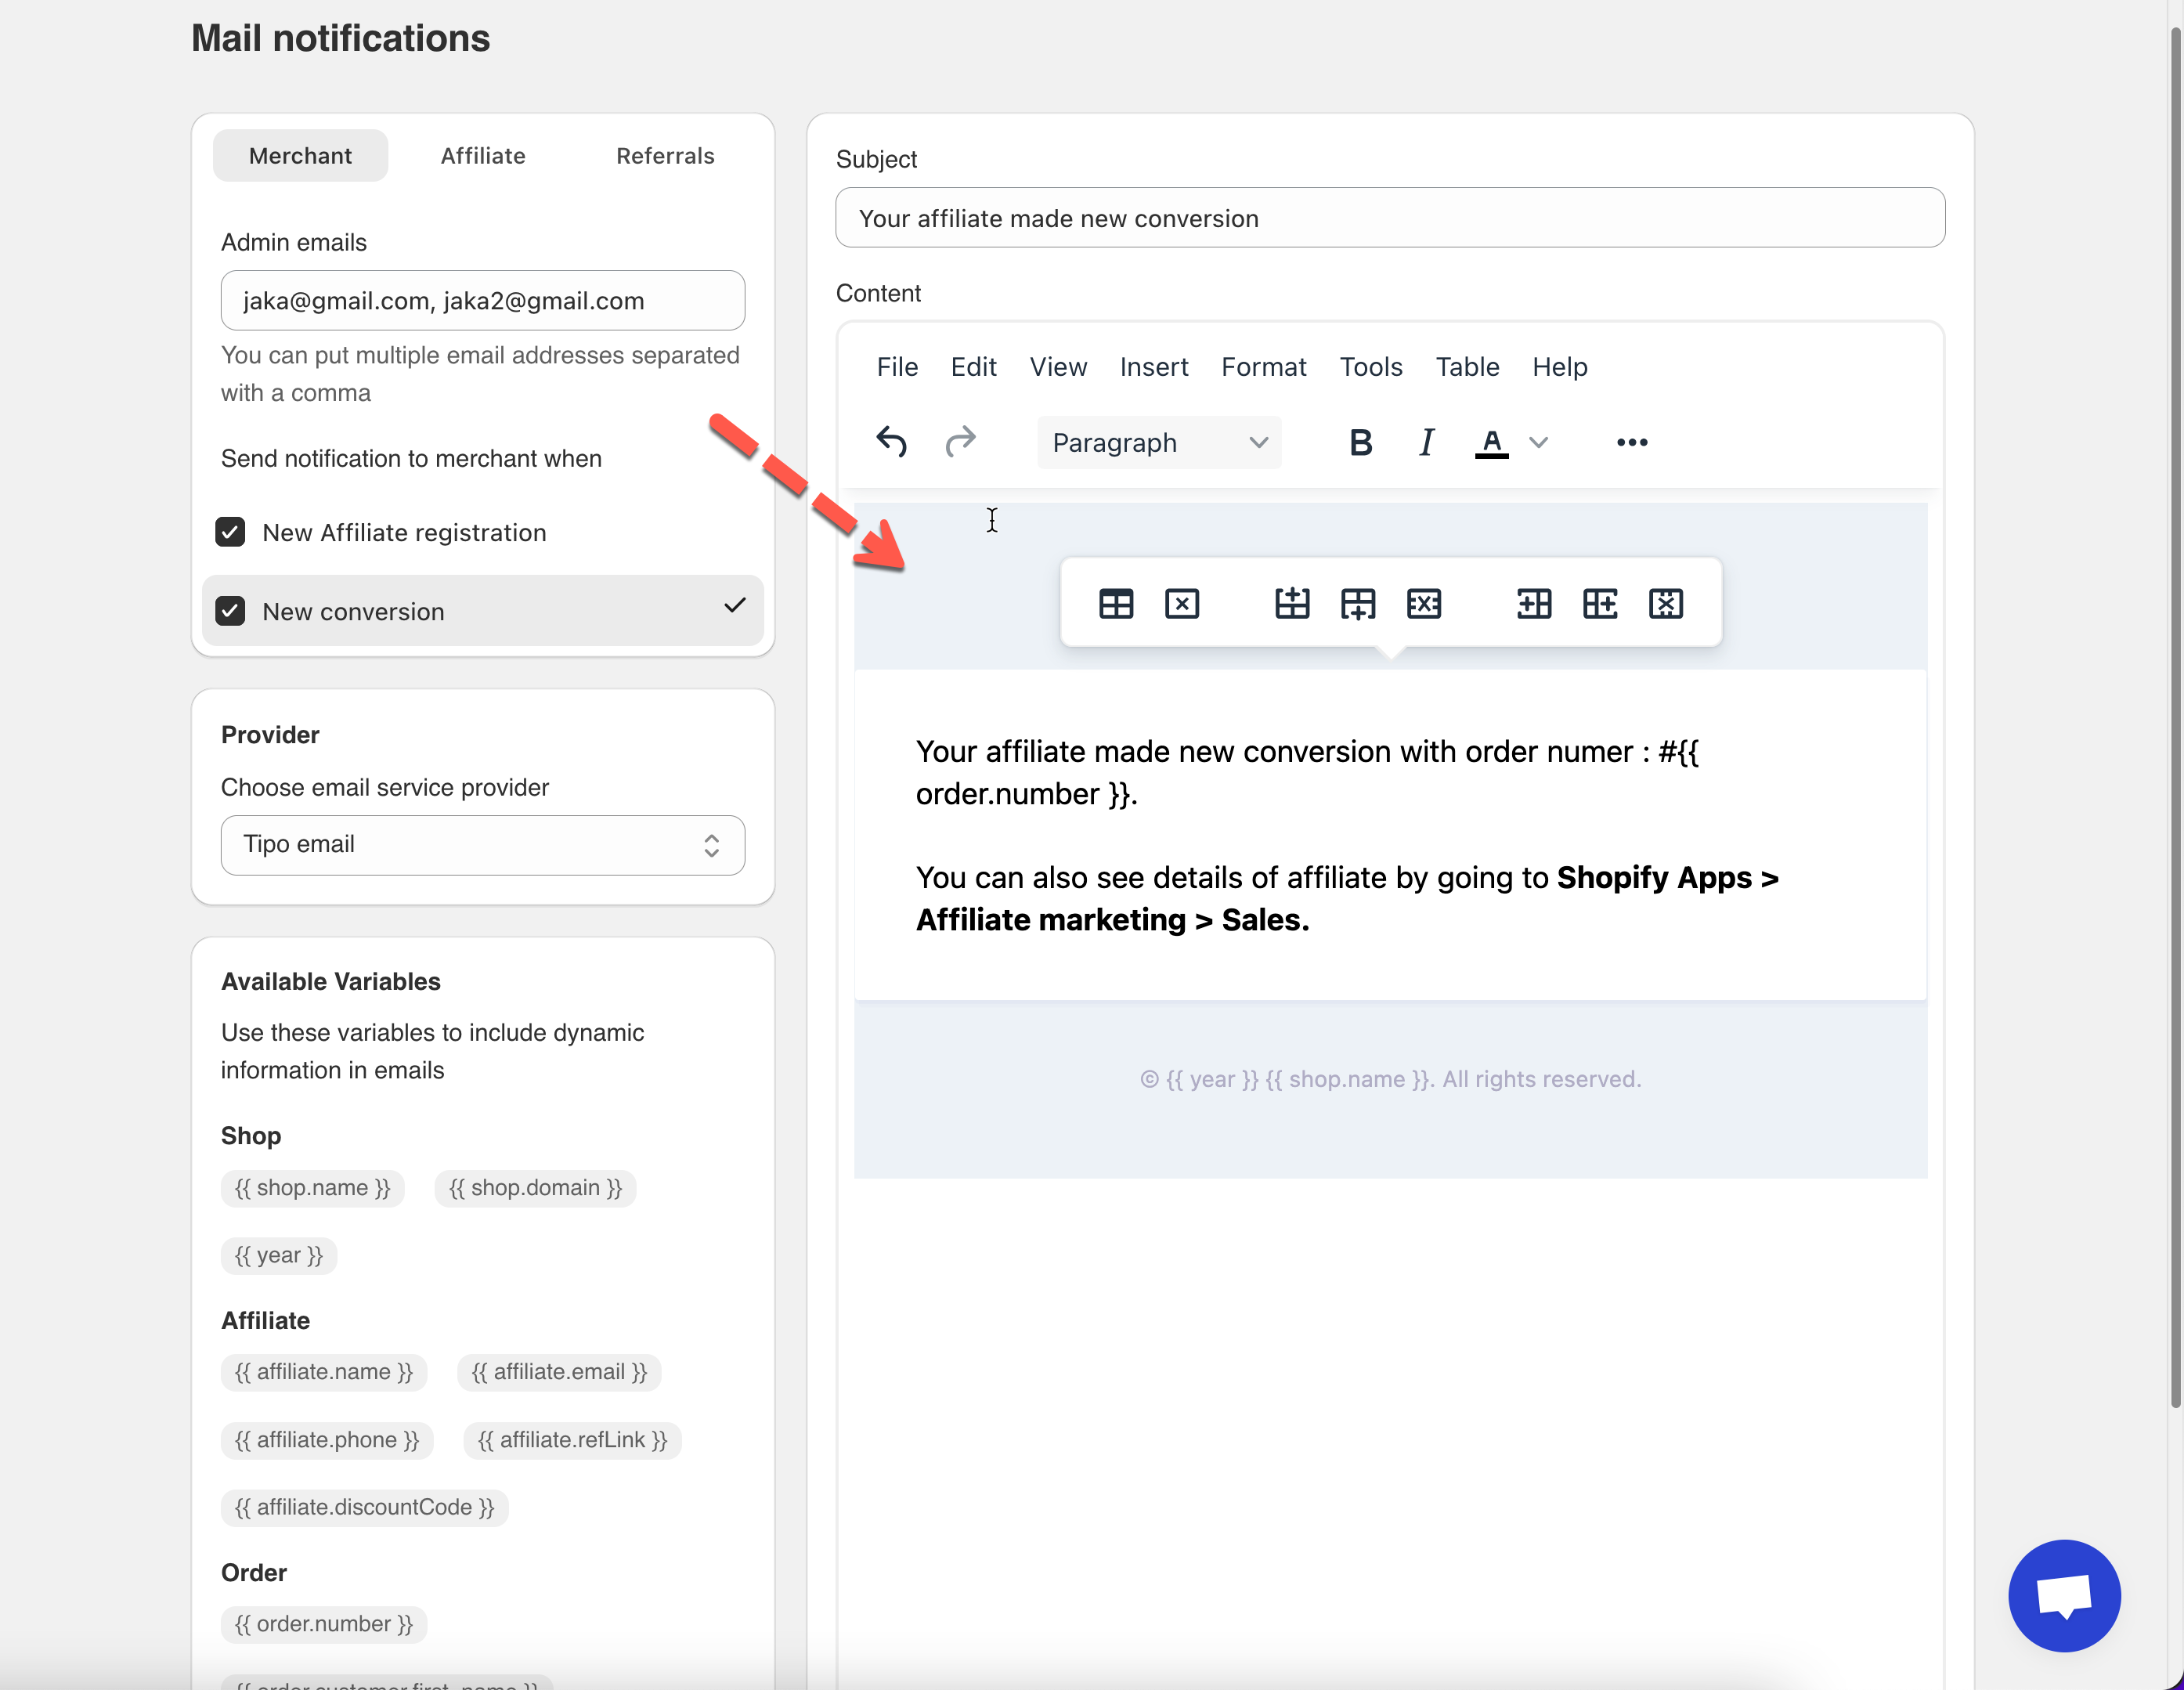
Under **Send notification to merchant when**, select the events you want emails for.
#### Available Admin Triggers
* ✅ **New affiliate registration**\
→ When a new affiliate applies or signs up
* ✅ **New conversion**\
→ When an affiliate generates a new order
You can enable one or both depending on how closely you want to monitor activity.
📌 Changes are saved automatically.
***
### ⚙️ Step 3: Edit Admin Email Content
On the right side of the screen, you can customize the email.
#### You can edit:
* **Email subject**
* **Email content (body)**
Example subject:
```
Your affiliate made new conversion
```
Example content:
```
Your affiliate made new conversion with order number: {{ order.number }}.
You can also see details by going to Shopify Apps > Affiliate marketing > Sales.
```
***
### ⚙️ Step 4: Use Email Variables
You can insert **dynamic variables** to show real data in emails.
#### Common Variables Used in Admin Emails
**Shop**
* `{{ shop.name }}`
* `{{ shop.domain }}`
* `{{ year }}`
**Affiliate**
* `{{ affiliate.name }}`
* `{{ affiliate.email }}`
* `{{ affiliate.refLink }}`
* `{{ affiliate.discountCode }}`
**Order**
* `{{ order.number }}`
📌 Variables are replaced automatically when the email is sent.
***
### ⚙️ Step 5: Choose Email Provider
In the **Provider** section:
* Select your email service provider (optional)
* Default option: **Tipo email**
📌 Make sure the provider is set correctly so emails are delivered successfully.
***
### Example: New Conversion Email Flow
1. An affiliate makes a sale
2. A new conversion is recorded
3. Jaka sends an email to admin emails
4. Email includes:
* Order number
* Shop name
* Link to check sales in the app
📌 This helps you react quickly to affiliate performance.
***